The technological world has changed tremendously when you think about how it looked like +25 years ago. Today, we all possess a phone with a camera that can document almost anything in good quality. In the 1990s, one had to invest in a VHS camera if they wanted anything resembling a good video recording. There was no such thing as a selfie, and we were all driven to take pictures in the moment without repeating the process of capturing the perfect Instagram photo. With this guide, we aim to provide you with insights into how to make professional video recordings with your smartphone without having to reach into your wallet and invest in expensive camera equipment.
Use the Right Camera on Your Phone
A typical smartphone has two cameras - a front-facing camera (selfie camera) and a rear-facing camera. When recording yourself with a phone, you can use both cameras. Although the selfie camera allows you to see yourself while recording, the rear camera generally offers higher resolution and image quality. Many people naturally use the selfie camera when recording themselves, but it is recommended to use the rear camera, as it again contributes to providing the best quality, especially if the proper lighting is also involved.
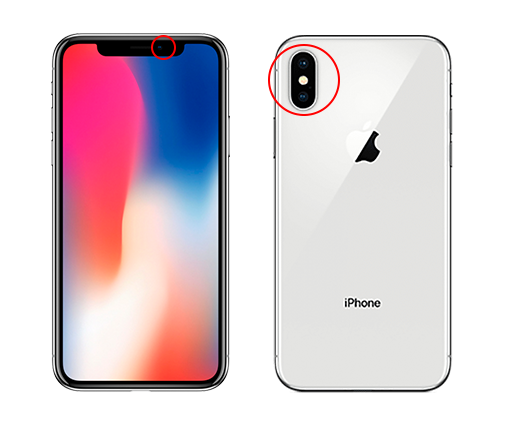
However, there is a challenge in using the rear camera. You cannot monitor and see yourself during the recording. This is crucial as you want to ensure that the video is in focus and recorded correctly. However, there are several solutions to this problem:
- a) Use a Mirror: This is a simple and effective method, and there is a good chance you already have a mirror at home. Place the mirror behind your phone and set it at an angle either upward or sideways to see the reflection of the phone's screen.
- b) Mirror the Phone Screen to a Laptop/PC: This will vary depending on the type of phone or computer you have:
- If you have an iPhone and a Mac computer, you can connect them with a charging cable and open QuickTime on your computer to record a new movie and select your iPhone as the camera.
- If you have a Windows computer and an Android phone, you can use the Connect app to mirror the phone's screen if both devices are logged into the same Wi-Fi network.
- If you have a tablet, iPad, Chromebook, or another mobile device, you can use a screen mirroring app like Mirroring360 to screen share between the devices.
- If none of the above options are available, you can use Reflector - a screen mirroring software that will work with any phone or computer. However, the program costs 178 DKK.
It is important to monitor the video while recording to ensure everything is in focus. Additionally, it is important to look directly into the camera when speaking. This will prevent you from appearing to look slightly away from the camera while speaking, which can be distracting.

Use a Gimbal/Tripod
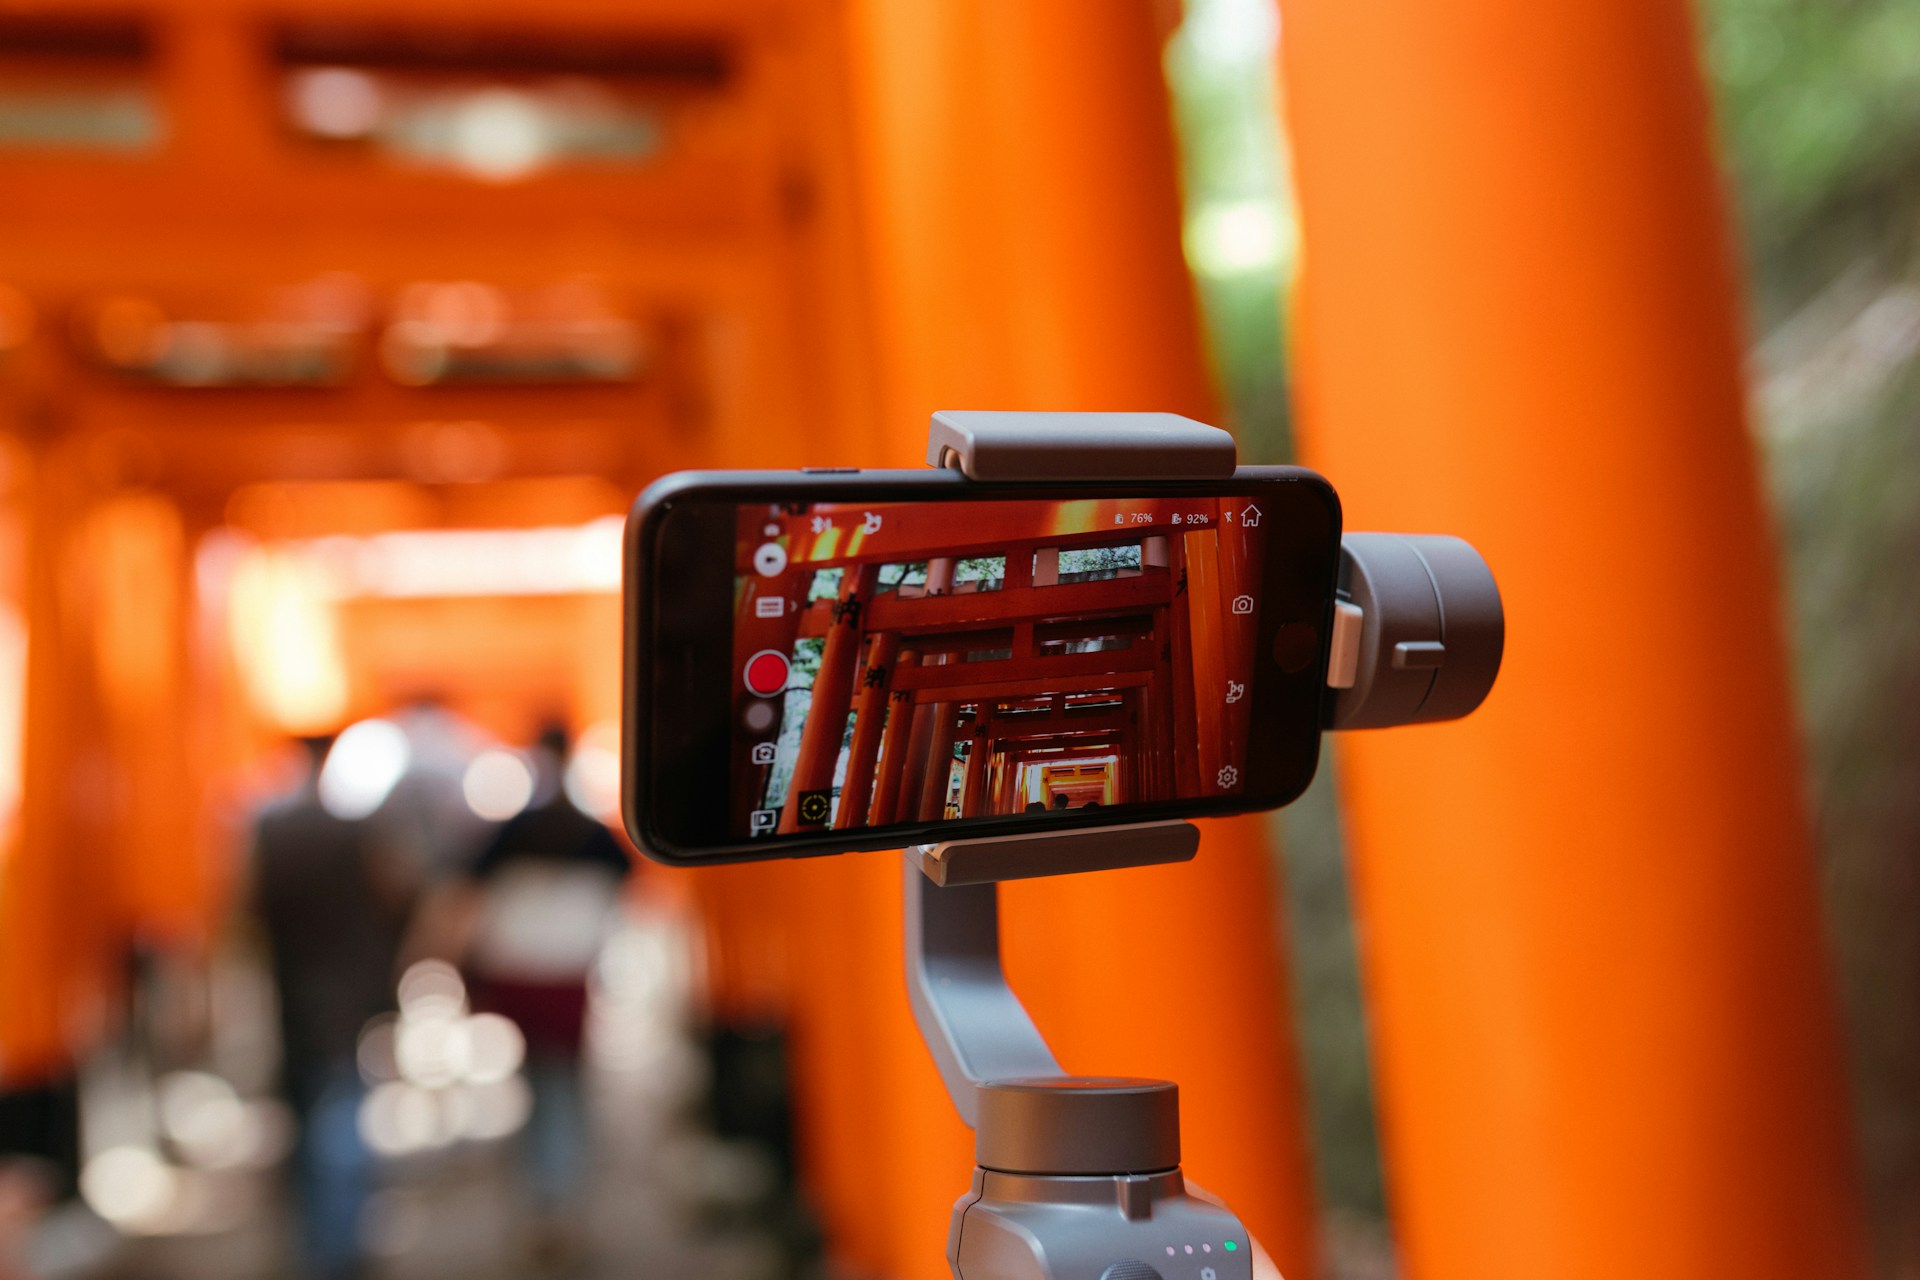
You can use a tripod, which provides you with a stationary image when recording, but you can also use a gimbal for more advanced shots and more movement. The two- or three-axis gimbals are essential for the smoothest, controlled, more elegant video recordings. They are available for mobile cameras, but also for heavier DSLR cameras.
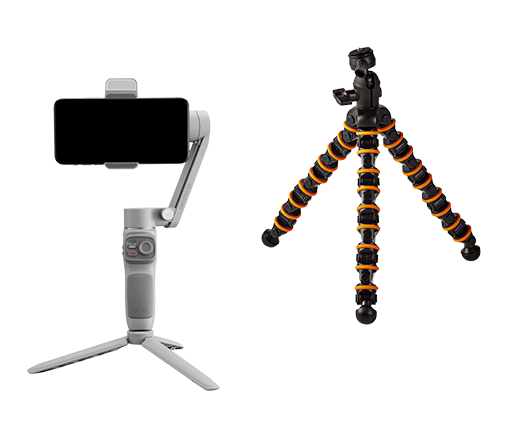
Types of Gimbals
A two-axis gimbal, in short, provides optimal stabilization on the two axes pitch and yaw. This means that when you mount your mobile camera on your gimbal, it can be stabilized, helping to reduce shakes and vibrations in these directions.
A three-axis gimbal, on the other hand, adds an extra axis, so it has pitch, yaw, but also what is called roll. This makes the three-axis gimbals more versatile and suitable for a wider range of tasks, especially in video recording, where there is more movement and vibrations.
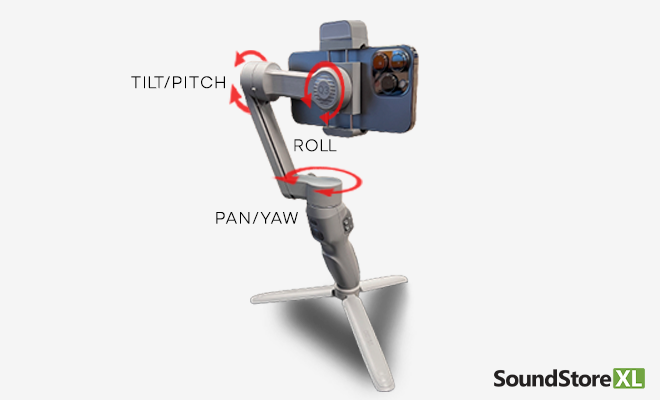
Extra Features
You can also get gimbals with extra features. For example, we offer gimbals with built-in lights, so you have the option to get some lighting directly on your face if you need to record yourself in a video and still make use of your gimbal.
Applications
When purchasing a gimbal, you will typically be able to download a corresponding app to your smartphone. This app enhances your video recording experience by offering a range of features tailored to specific scenarios such as sports, action, panoramas, or landscapes.
You can also use the app to edit your recordings, so you can easily produce polished and shareable videos quickly. Additionally, you have the option to acquire additional equipment like microphones to ensure high-quality audio while recording footage on the go.

Use the Right Video Composition
The composition of your recording is crucial to make your video visually appealing. It's important to orient yourself with regard to where you will upload your videos. If you plan to upload the video to YouTube, record it in landscape mode (16:9 format).
However, if you are going to upload it to TikTok, Instagram, or YouTube Shorts, it's best to record it in portrait mode (9:16 format). If you're not sure where it will be uploaded, you can record it in landscape mode and crop it later if necessary.
Remember Head Space
When recording, also consider headspace. Leave a small space between the top of your head and the frame, and make sure the top of your head is never cropped. To avoid unnecessary cropping, you can use the 3x3 grid on your phone when recording. With the gridlines, you can easily position your subject within the frame and ensure that you don't crop anything that should be included in your recording.
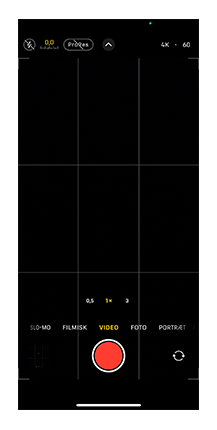
Placing the object/person in the center is also significant for viewer interest. It's not always necessary for the video, but centering the person or object creates symmetry, especially if the person in the video has a message to convey.
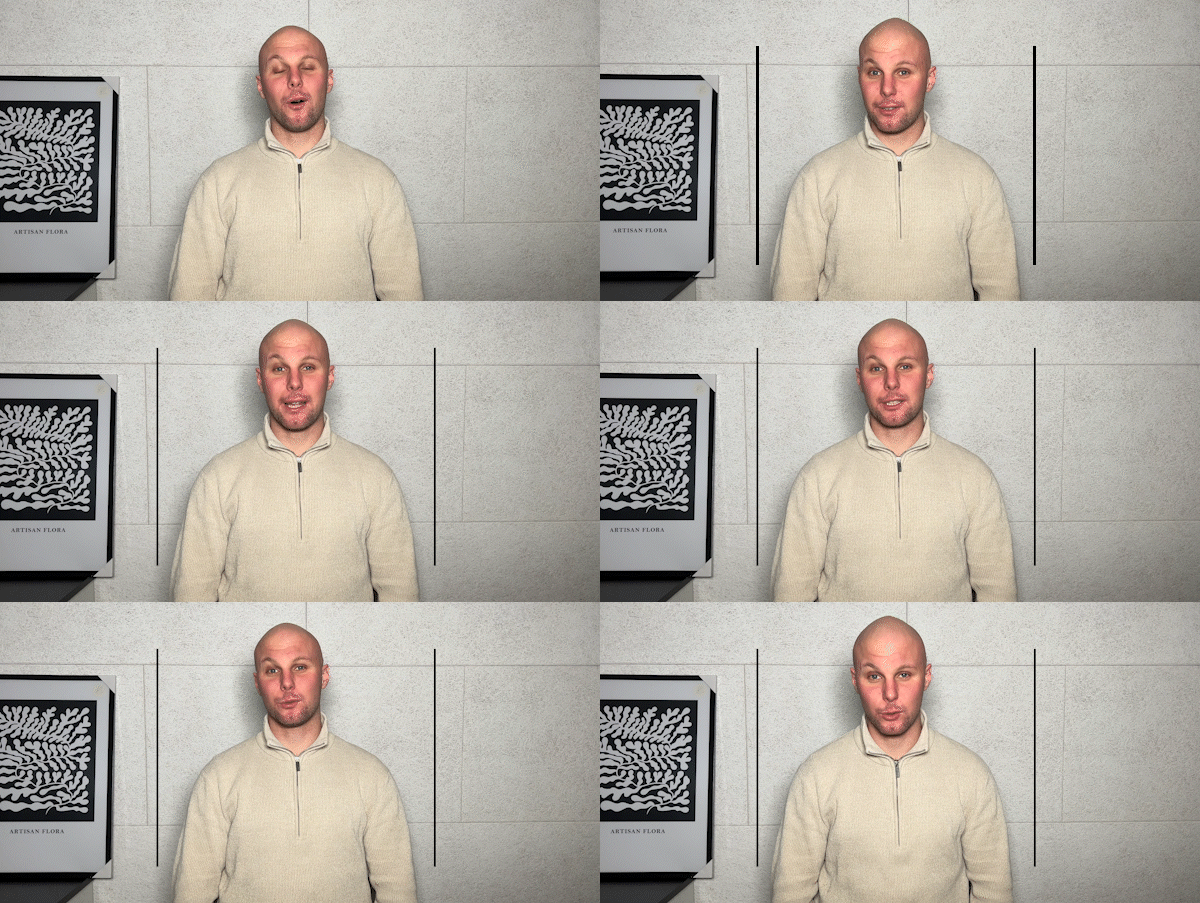
The Background Matters
When filming yourself, it's essential to have an interesting background. For a talking head video, it's best to avoid blank walls and cluttered backgrounds and instead opt for a minimal background with a few elements that add color, act as backlighting, or relate to your story. This can also add depth to the image.

Manual Camera Settings
Most phones today come with a built-in camera app, but that app usually doesn't offer much control over your focus, shutter speed, aperture, ISO, and all the things you can control compared to a professional camera. Instead of using your phone's camera app, you can download a third-party app like Filmic Pro - Video Camera to control all these different functions and have more control over the recording process.
Here are the default video settings you'll use when your camera is in manual mode:
- Set your frame rate to 24 frames per second, as this is the most commonly used frame rate in film production, allowing you to create smooth videos.
- Set your shutter speed to 1/50 second to ensure it's not too fast or too slow while letting in enough light without causing flicker in the image. You'll typically want your shutter speed to be double your frame rate.
- Set your ISO as low as possible - to get enough light in your shot without introducing noise into your footage. The higher your ISO, the grainier your image becomes, and it's not very pleasant.
- Most smartphones today have good autofocus, but you may encounter issues in low-light situations. In such cases, it's best to have an external light source to ensure the camera's sensor receives enough light to focus optimally. Alternatively, you can also choose to focus manually and have control over it.
Note: To set your focus, you need to have an object in the spot where you'll be sitting (use a pillow or hat). Then, tap on the screen to focus on it, and then lock the focus.
Video Lighting
Good lighting in an image or recording is crucial for quality and clarity. It makes it more appealing to watch, and with the right lighting, you avoid murky images and spend less time in post-production adjusting color correction, exposure, white balance, etc.
There will never be a completely correct formula for 100% correct lighting setup, as it depends a lot on the direction you want for your image or video. Lighting setup doesn't necessarily have to be only warm or cold light; it can also have colors and set a completely different mood.

When shooting an interview, a product, or close-ups of a face like a makeup artist's, it requires different ways of lighting. Light also contributes to setting a happy or sad mood. For a happy mood, you'll probably want a lot of light, possibly with some colorful objects in the frame, whereas for a sad mood, you should adjust the light's placement so that darkness is also prominent.
If you're doing interviews, recording yourself, or others, we have some good ideas for your lighting setup and which video lights to use.
- Natural sunlight is some of the best, especially when the sun is shining, and there are no clouds in the sky. If there are clouds, be aware, as the light pattern can change if the sun goes behind a cloud.
- An LED lamp can help enhance natural light, but everything in moderation!
- When filming outdoors, make sure the sun is behind you and shines down on the object or person being filmed; otherwise, it can create dark silhouettes of people's faces, making your clips unusable. So, avoid filming directly into the sun.

- You can soften the light by placing a white sheet or parchment paper in front of the lamp, but we strongly recommend our softbox equipment, which can solve this.
- Avoid overhead lighting, as this creates dark shadows under the eyes of the person standing or sitting beneath. It's not very flattering and has the opposite effect of highlighting the face.
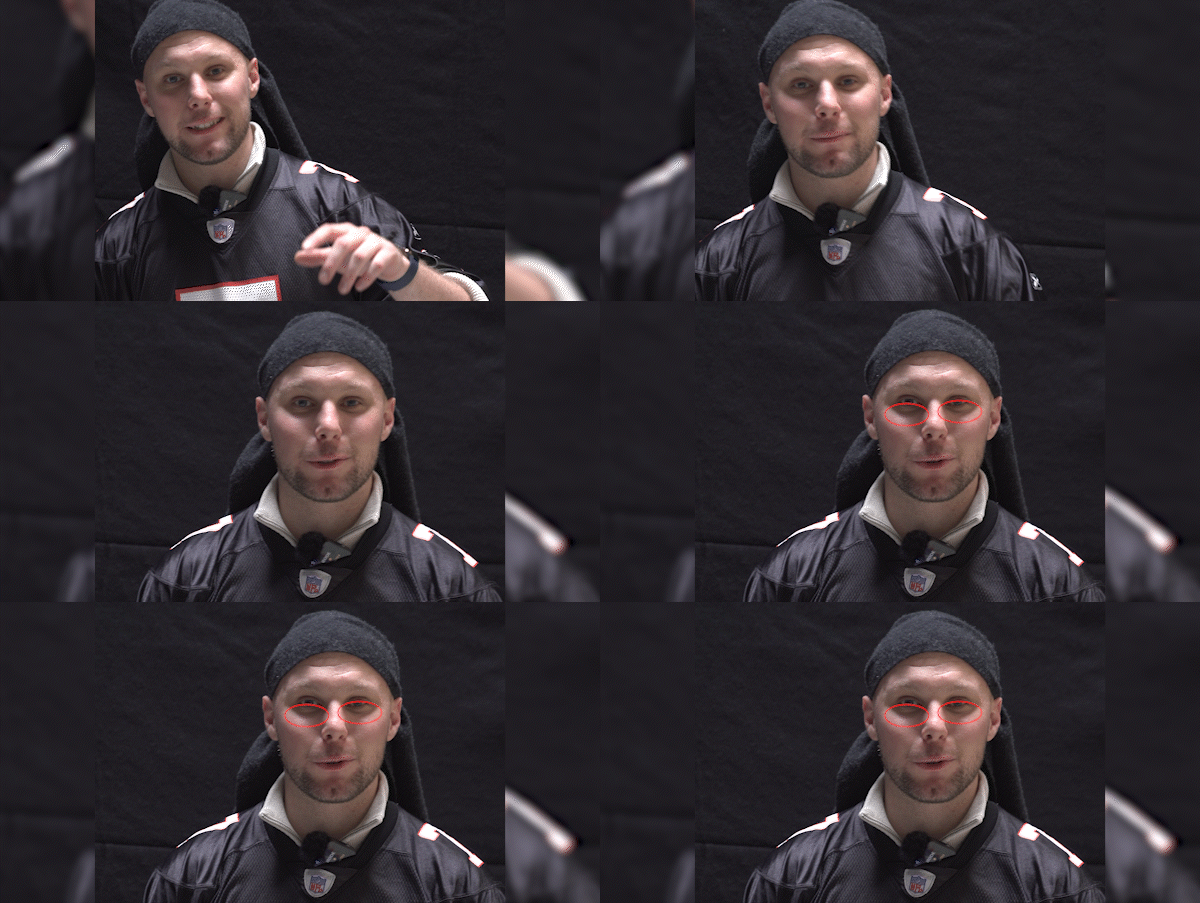
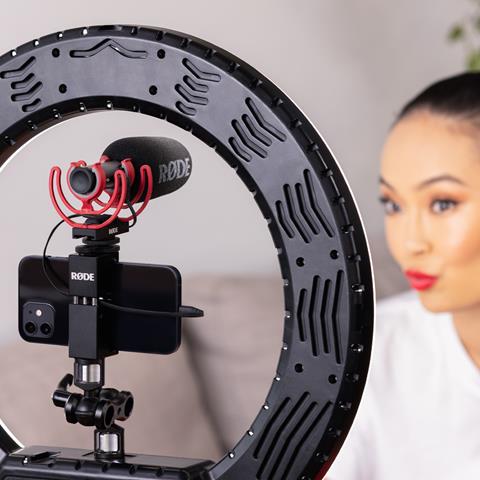
- You can buy LED Ring Lights, which are quite effective, especially for hobby-level video. Plus, they don't cost much.
We also highly recommend our LED Light Kit, which includes tripods and a bag.
Angles for Lighting Setup
The angles for lighting setup also play a huge role. You can have an expensive quality camera with insane aperture or shutter speed, but light will forever be crucial for the sharp image.
The three well-known lighting setups are:
- Main Light
Main light is essentially the main light source. It is from here that you get the most light for your recording. The lamp should be placed 45° towards your face as this provides the most natural image.

- Fill Light
Fill light is more or less light that fills in some of the shadows on your face. It is less bright than the main light and softens the shadows so they don't look unfavorable. Again, you want to place this about 45° from the main light on the other side.

- Back Light
Backlighting highlights you from the background. This is used to separate you from the background and give the subject/person character. Again, it's ideal to place this not directly behind you, but at an angle.
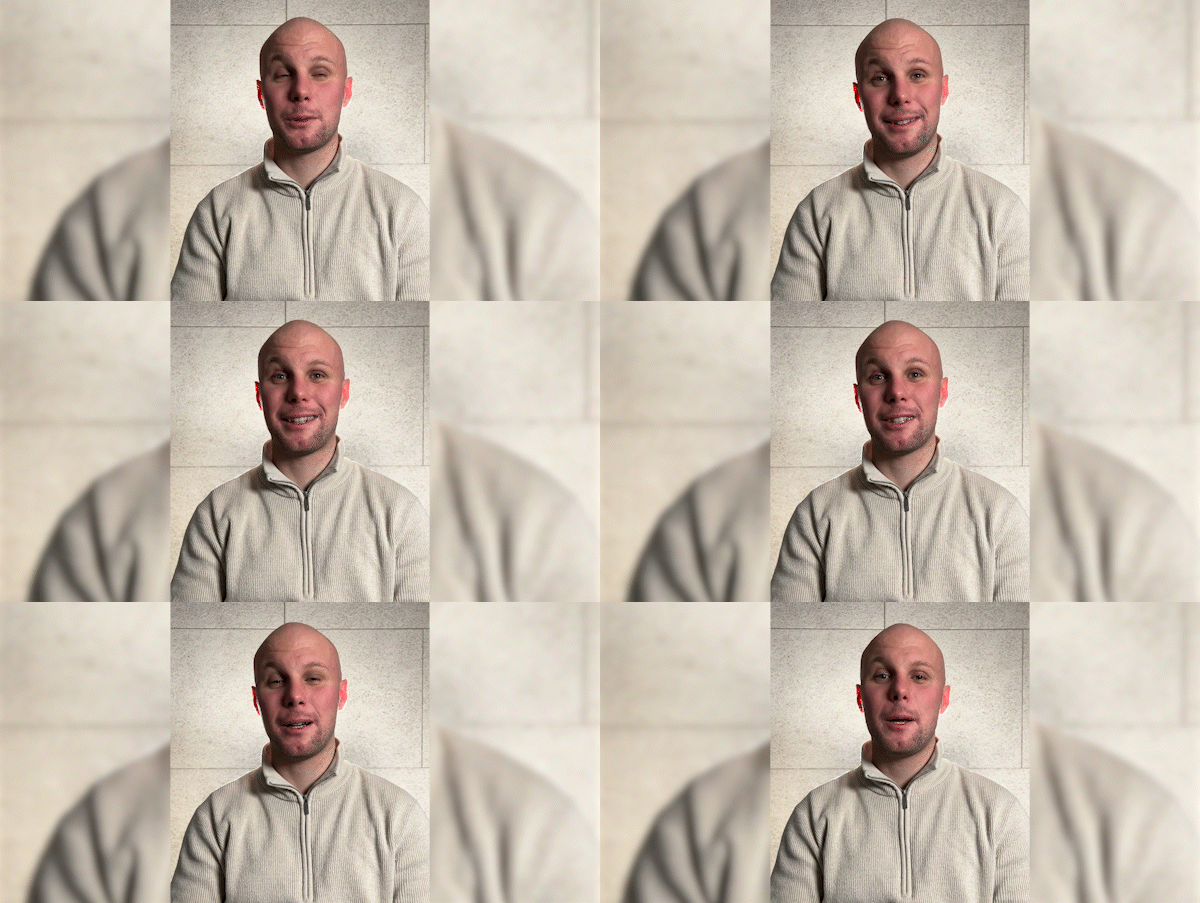
Sound and Camera Microphones
We've all experienced the frustration of poor sound, especially when you can't hear what someone is saying in a video, either because they are standing at the wrong angle in relation to the built-in microphone on a smartphone, or because the distance is too great. People will still tolerate average video quality, but they will quickly click away if your sound is bad.
There are countless options for optimizing sound in a video. The angle, one's own output when speaking, the distance, and yes, actually whether you choose to invest in external camera microphones of significantly better quality.
Camera Microphones
As mentioned, it's always a good idea to invest in microphones as it's crucial for good sound. At SoundStoreXL, we offer, among others, the RØDE Wireless Go II, which is among the most popular choices for both professional videographers and ordinary consumers.
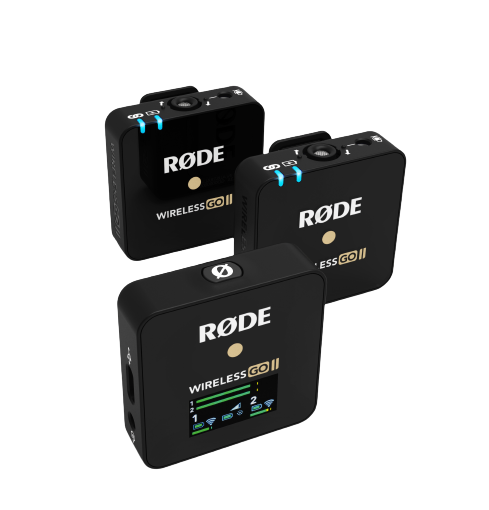
They are everything you need for high-quality sound, and they are extremely portable, being small and weighing almost nothing. They can also be clipped onto your shirt, so they pick up everything you say without worrying about the distance to the built-in microphone on your smartphone when recording. There's also an app for them, RØDE Central, which is incredibly user-friendly and via USB-C can transfer your audio files to your PC in no time.
Another great alternative is the shotgun microphone RØDE VideoMic Go II, which is packed with a lot of great features. However, you need to consider the distance more with this type of microphone, as you don't attach it to your clothing. They are either mounted on your tripod, gimbal, or maybe your ring light. It is therefore essential to have the right distance to the microphone.



→ Back to our Information Center ←
Terms and conditions for private clients
Click here to see our terms and conditions for business clients
Music Group Denmark A/S and this e-commerce shop will be referred to as "seller, us, we, our, the webshop", while the client purchasing a product from Music Group Denmark A/S will be referred to as "buyer, client, customer, you, your, yours”.
Address:
Music Group Denmark A/S
Norddigesvej 4
DK-8240 Risskov
DENMARK
info@soundstorexl.com
Tel. +45 70273041
Private company
VAT: DK-33777175
Year of establishment: 2011
Delivery
The delivery costs depend on the size and weight of the order as well as the address and country of its destination. Please visit our Information Center for an updated country-specific price list. We reserve the right to charge the actual shipping price in case of goods exceeding the carriers' standard size and weight restrictions. We will inform the customer about this before the order is completed.
You have the option to enter an alternate shipping address, e.g. your workplace, when placing the order.
The sender of the package will be our logistics provider Online Distribution.
Please note:
When you order goods for private delivery, the order can be delivered by one or more carriers due to the fact that our suppliers use different freight companies. Packages will be handled according to the company’s method of conveyance.
You can find a list of our carriers in our Information Center. If you would like to know who will be delivering your order, in most cases you can find the information on Your Account. If this is not stated, please feel free to contact us.
Payment
In our e-commerce store you can pay with the following means of payment:
Credit cards
MasterCard
MasterCard Debit
Maestro
Visa
Visa Electron
The amount will not be drawn until we ship your order and we cannot draw a larger sum than the one you approved at the time of purchase.
Bank transfer
Please transfer the total order amount (including the delivery fee) to our bank Spar Nord Bank A/S:
BIC/Swift code: SPNODK22
IBAN: DK2290041120451932
We will charge no fees for banktransfers.
Gift certificate
Please note that you can only use one gift certificate per order.
For information on other country-specific means of payment, please click here.
When we have received the payment, we will ship your order immediately.
Prices
We reserve the right to cancel an order due to incorrect pricing in our e-commerce store (this might occur due to automatically calculated prices). The automatically generated confirmation, you will receive upon placing your order, is thus simply a copy of the online shopping cart - not our final order confirmation.
It is possible for you to view your previous orders in our online shop (starting from when you created a login with us). After logging on you can print your invoices etc.
Please note that both Danish and international private clients will be charged VAT according to Danish legislation.
Terms and conditions for discount codes and gift certificates
Unless stated otherwise, the following terms apply to the use of discount codes when placing a regular order (not applicable to individually prepared offers).
1. A discount code can only be used once per customer per day.
2. You cannot use more than one discount code per order.
A gift certificate is considered a deposit, not a product purchase. A gift certificate cannot be used as payment for a new one.
Right of return/cancellation
When shopping with us, you have 30 days right of cancellation. It expires 30 days after you:
When returning a product to us, please download our return form, fill it in and include it in the package.
Please note that some goods cannot be returned as normal cargo due to their size (this usually applies to goods over 30 kg or 2 meters in length).
You cannot cancel an order just by refusing to accept delivery without specifically letting us know.
Goods not included in the right of return/cancellation
We do not accept the return of demos and goods that have been made or ordered specifically for you (e.g. items that have been shortened according to your instructions or custom-made items). Furthermore, we do not accept the return of certain product categories, as it is impossible to assess the extent to which they have been used: pickups, pickup needles, bulbs, liquids, paint etc.
Return policy
Please use this return address:
Music Group Denmark A/S
Norddigesvej 4, Gate 6
DK-8240 Risskov
DENMARK
Please note that it is not possible to send us the goods COD.
We only accept products returned in their original packaging and only if the included software is not enabled. This means that when we receive the returned products, they must always be in minimum the same condition as when we shipped them. Therefore we kindly ask you to make sure that the item is properly wrapped. Since you are responsible for the goods until we receive them, we encourage you to keep your track and trace number from the carrier.
Please include a copy of the order confirmation or other documentation for your purchase when returning the item to us.
Please note that you are responsible for covering the shipping costs when returning a product to us.
In cases where the right of cancellation is used, we refund your purchasing price plus the delivery costs (if you had any when the goods were delivered to you) as soon as possible (and no later than 30 days from the day we received notification of your decision to cancel the order).
Please note regarding returned goods:
We always check goods returned to us, and you might lose your payment in part or in full. This happens if a product has been damaged or its value has been reduced. Among other things this could be the case for one of the following reasons:
Refund:
We make the refund with the same means of payment that you used for the original transaction unless we have explicitly agreed otherwise. If you paid with credit card, we will transfer the money back to the same card.
We can withhold the payment until we have received the returned item from you (unless you have submitted documentation for returning it). We refund the amount that you paid for the goods as soon as possible (and no later than 30 days from the day we received notification of your decision to cancel the order).
Read more about the cancellation of orders paid with MasterCard and Visa Card.
If the product is faulty (right of complaint)
When you shop in our e-commerce store you are protected by Danish legislation offering a high level of consumer protection. You have 12 months warranty and 12 months right of complaint which allows you to submit a complaint about errors or omissions that existed when the item was sold.
We do not provide support or warranty on free software (e.g. a trial or limited edition). The manufacturer provides the software support.
It is a requirement that the complaint is justified and that the defect has not arisen as a result of an incorrect use of the product or other damaging behaviour.
Please have a look at our Information Center for answers to frequently asked questions regarding this.
You are also very welcome to contact us. Depending on the specific situation we can tell you where the burden of proof lies, if the goods can be repaired or exchanged or if a discount can be an option.
Repair
If an error occurs with a product within the warranty period (12 months warranty from date of purchase + 12 months right of complaint), please contact us with a detailed description of the issue. Then we can arrange the details of the repair before you ship it.
Sending the product for repair consists of the following steps:
Fill in our online RMA form (repair form) to help us minimize the turnaround time.
Send it to us.
Await our answer regarding repair.
Send the product according to our instructions. We might ask you to send the product directly to the manufacturer to shorten the expedition time. Please note that it is not possible to send the goods COD.
When sending the package you MUST enclose:
An address to which we can return the product after repair
A list of the equipment included in the package, e.g. power supply
A copy of the original invoice (can be found in your customer account)
We will then get back to you as soon as possible.
Repair terms and conditions
The product must be sent securely wrapped, at best in its original box.
In case the stated error cannot be observed, or if the error has been caused by another product, an inspection fee of €55 including VAT is charged by invoice. The amount must be paid before the product can be returned to you.
Please note that you are responsible for covering the shipping costs when sending a product for repair. We pay the costs when returning the product to you after repair (only for private clients and only if the repair is covered by the warranty or right of complaint).
Personal Data Protection Policy
In order for you to enter into an agreement with our e-commerce store, we need the following information:
We solely register this personal information in our system for the purpose of processing your order.
No personal information recorded on our webshops will ever be transferred, sold or made available to third parties. All information is stored in a secure manner and is only available to our trusted employees.
Our e-commerce store has a highly encrypted and secure system for online payments to guarantee your safety when shopping with us.
The webshop system uses so-called cookies to manage the content of your shopping cart. In short, a cookie is the name of a file stored on the buyer's computer. We use these cookies to recognize customers and, for instance, remember what items are in the shopping cart when you shop with us. It is also possible for you to ask the system to store your contact details for your next visit. If you ever want to erase the information stored via cookies, this can be done in the browser settings. In Internet Explorer, for instance, please go to the "Tools" menu and then choose "Internet Options".
In addition, we register the IP address from which the purchase is made. This information is normally not used, but can be used in the case of a police investigation. The IP address is stored as long as necessary in relation to the police investigation. All fraudulent orders will be reported to the police!
According to Danish legislation the personal data are registered with Music Group Denmark and stored for five years after which the information is deleted.
When collecting personal information through our website, it is always done with your preceding consent. In that way you always know which information we have and why.
Our managing director and customer service employees have access to the information that is registered about you. The managing director of Music Group Denmark, Palle Bertelsen, is our systems manager.
When you are registered with Music Group Denmark A/S, you are always entitled to object to the registration. According to Danish legislation you also have the right to insight in the information we have on you. Please contact Music Group Denmark on info@soundstorexl.com regarding this matter.
Log entry
We use log statistics on our e-commerce store, which means that our system collects information that can give us statistics on e.g. the number of visitors, where they come from and where on our shop they drop out. Log statistics are used only for the purpose of optimizing our online shop.
You can choose to have your email address included on our mailing list. After registering you will regularly receive news and other information regarding our e-commerce stores. You may subscribe or unsubscribe this service at any time.
When you are registered with Music Group Denmark A/S, you are always entitled to object to the registration. According to Danish legislation you also have the right to insight in the information we have on you. Please contact Music Group Denmark regarding this matter:
Music Group Denmark A/S
Norddigesvej 4
DK-8240 Risskov
DENMARK
VAT: DK-33777175
Tel.: +45 7027 3041
info@soundstorexl.com
Complaints
If you want to complain of your purchase, please contact our customer service at info@soundstorexl.com or telephone +45 70273041.
→ Back to our Information Center ←